Advanced Tools and Troubleshooting
NetBox Enterprise is designed to harness the power of Kubernetes while minimizing the amount of work the average person needs to manage it. However, sometimes it's still useful or necessary to peek under the hood.
Applications
The following applications are used for various facets of administration:
- kubectl*: CLI for interacting with clusters.
- preflight*: CLI for manually running preflight validation checks.
Install by running:
curl https://krew.sh/preflight | bash - support-bundle*: CLI for manually generating support bundles.
Install by running:
curl https://krew.sh/support-bundle | bash - k9s: a TUI for managing and viewing cluster resources.
* provided by the NetBox Enterprise install
Accessing Your Cluster from the Command Line
If you are running the NetBox Enterprise installer, you will need to first execute a command to get a shell environment that knows how to interact with it. To do this, run:
/var/lib/embedded-cluster/bin/netbox-enterprise shell
Accessing Your Cluster from the Web
The admin console is always available at https://your-cluster-host-or-ip:30000/ in a default NetBox Enterprise install.
Generating a Support Bundle
Command-Line
Access your cluster from the shell. If you haven't installed the support-bundle package, do so now.
Run:
kubectl support-bundle /var/lib/embedded-cluster/support/host-support-bundle.yaml --load-cluster-specs
This will run a series of tests and provide a short summary of what it found, much like the preflights that run during install and when deploying.
When complete, the TUI will display, like so:
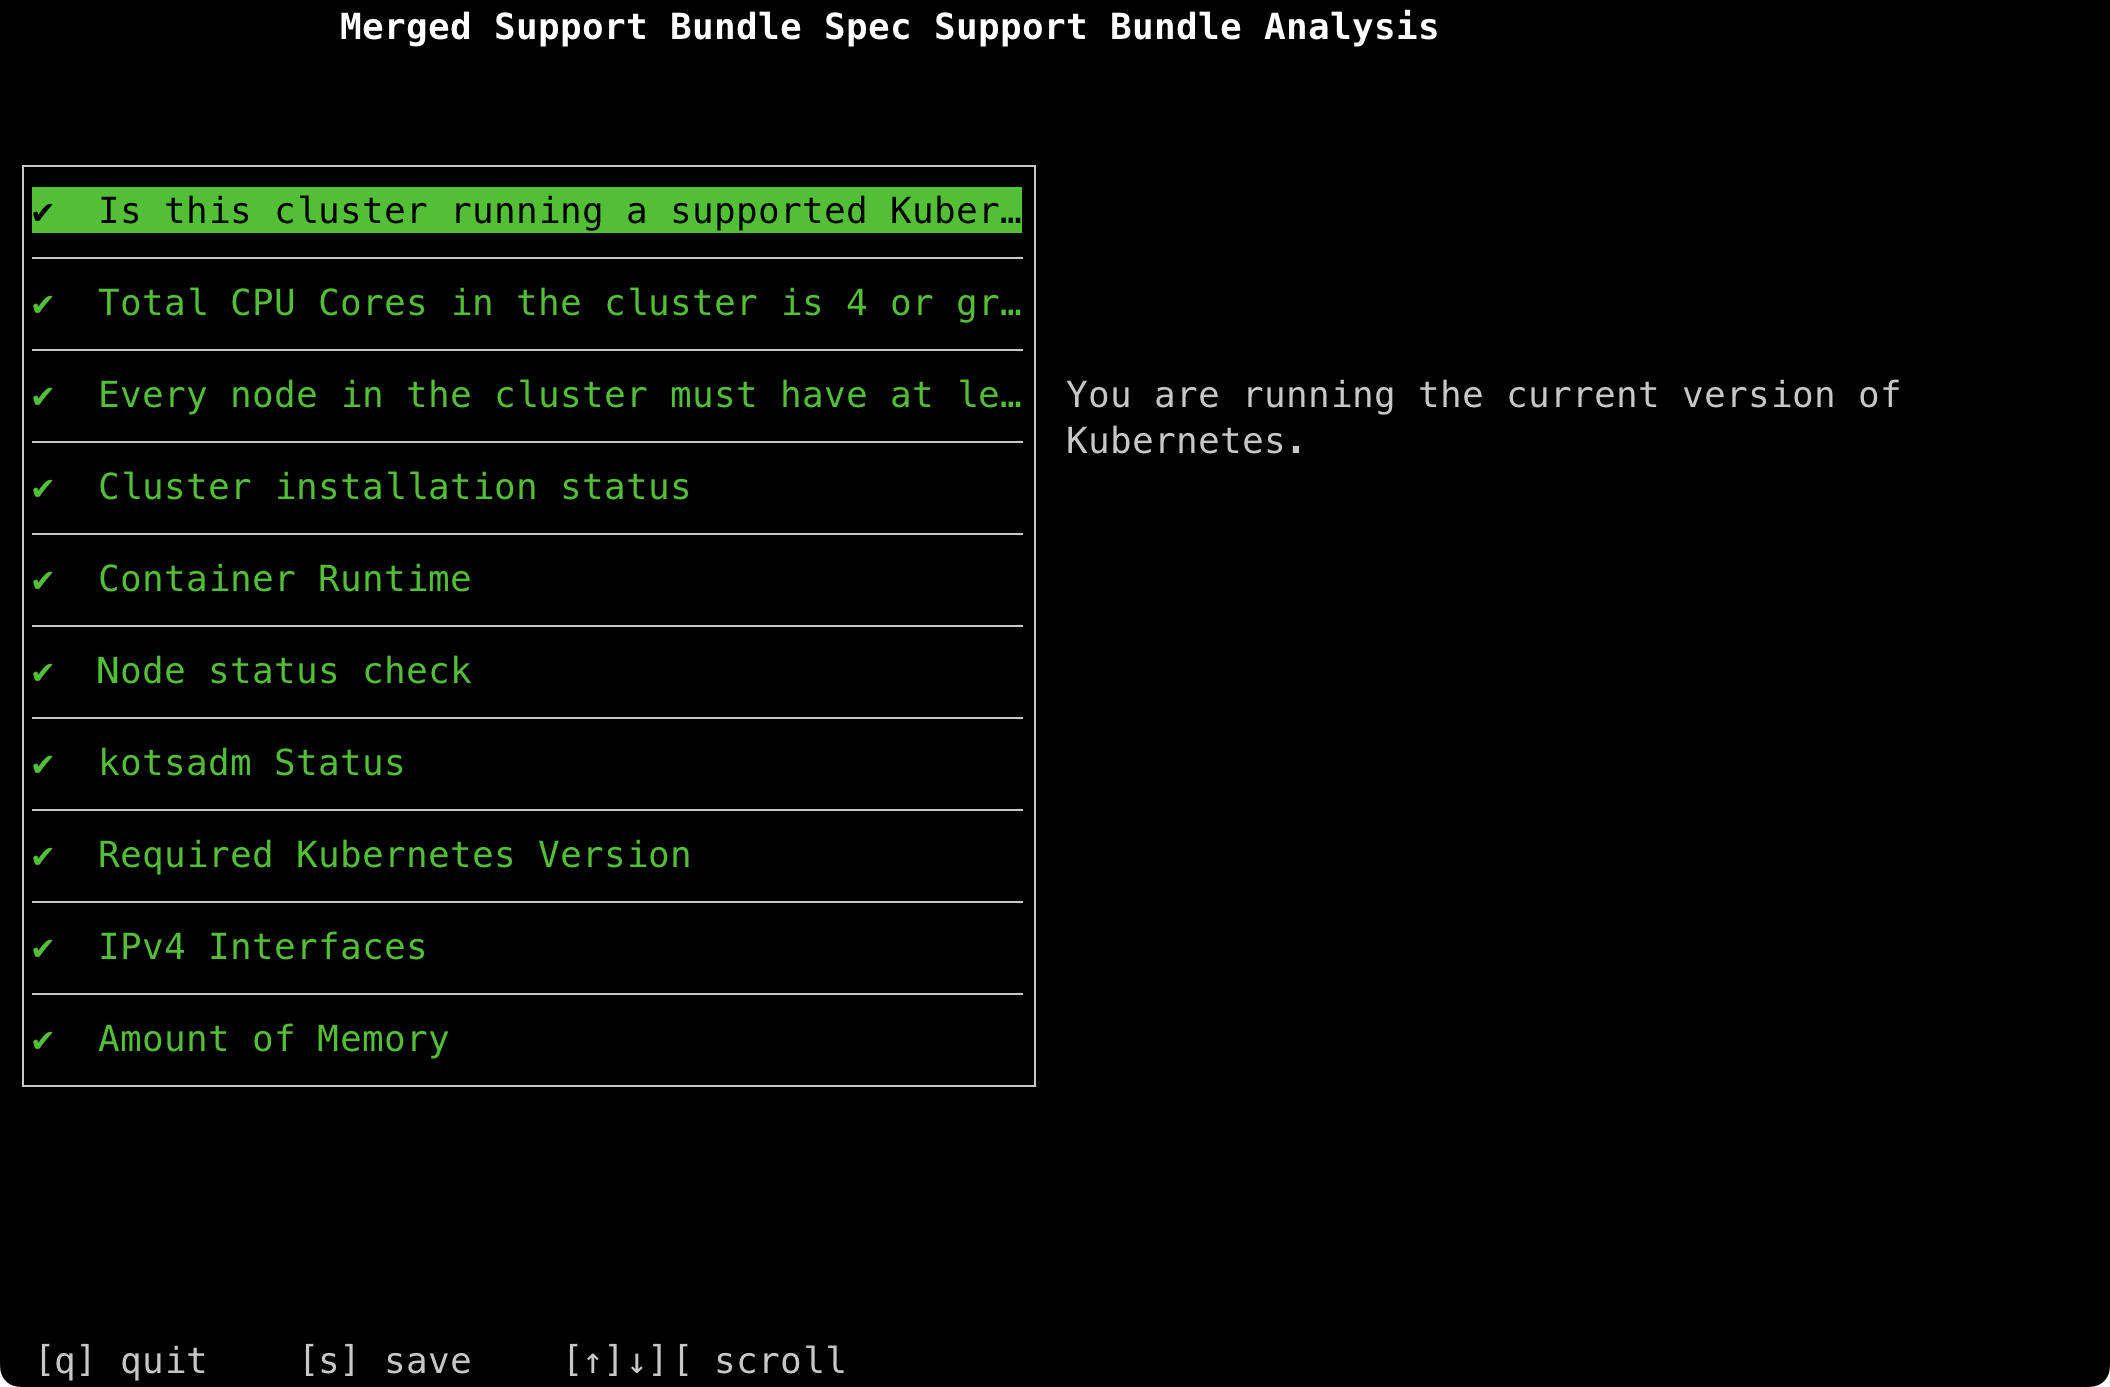
Typing s to save will save a short summary .txt file of the output you can see in the TUI.
Typing q to quit will quit without saving the summary.
In both cases, a .tar.gz support bundle will also be created in the current directory.
This file can be used by NetBox Labs to troubleshoot your system.
Debug Logging
⚠️ Warning: Do not enable debug logging in production environments. Debug logging can expose sensitive information to unauthenticated users and significantly impact system performance.
Enable debug logging to increase log verbosity for troubleshooting issues. Debug logs provide detailed information about system operations and can help diagnose problems.
Enabling Debug Mode
- Access the admin console
- Navigate to "Config" section
- Find "Enable Debug Logging" toggle
- Enable the toggle
- Click "Save Config"
- Deploy the updated configuration

Viewing Debug Logs
Access the logs using:
kubectl logs netbox-enterprise-<pod_id> -n kotsadm
Log example:
